Setting Up SendGrid
To set up SnowCloud to utilize SendGrid, you’ll need to create an account, obtain an API key, and perform some basic setup. In this guide, we’ll walk you through the process of setting up SendGrid for use with SnowCloud.
Requirements
-
You will need an accessible email address you’d like to use for your company’s confirmation emails. For example, confirmations@example.com.
These emails will come from the SnowCloud Shop to your guests with purchase information, account sign-up links, and two-factor authentication requests.
-
Your domain administrator will need to add DNS records to your domain during this process.
Step 1: Account Creation
To get started, we’ll need to create a new SendGrid account, as well as a sender identity. Here’s how to do it:
-
Upon login, you should see this screen to create a sender identity. Move forward by clicking on Create Identity.
If you don’t see this screen, you can navigate to it by clicking on Settings, then on Sender Authentication.
-
Enter all information as required. Most importantly, ensure that you set the From Email Address to the one that you would like your SnowCloud Shop emails to come from. For example, confirmations@example.com.
Step 2: Domain Authentication
-
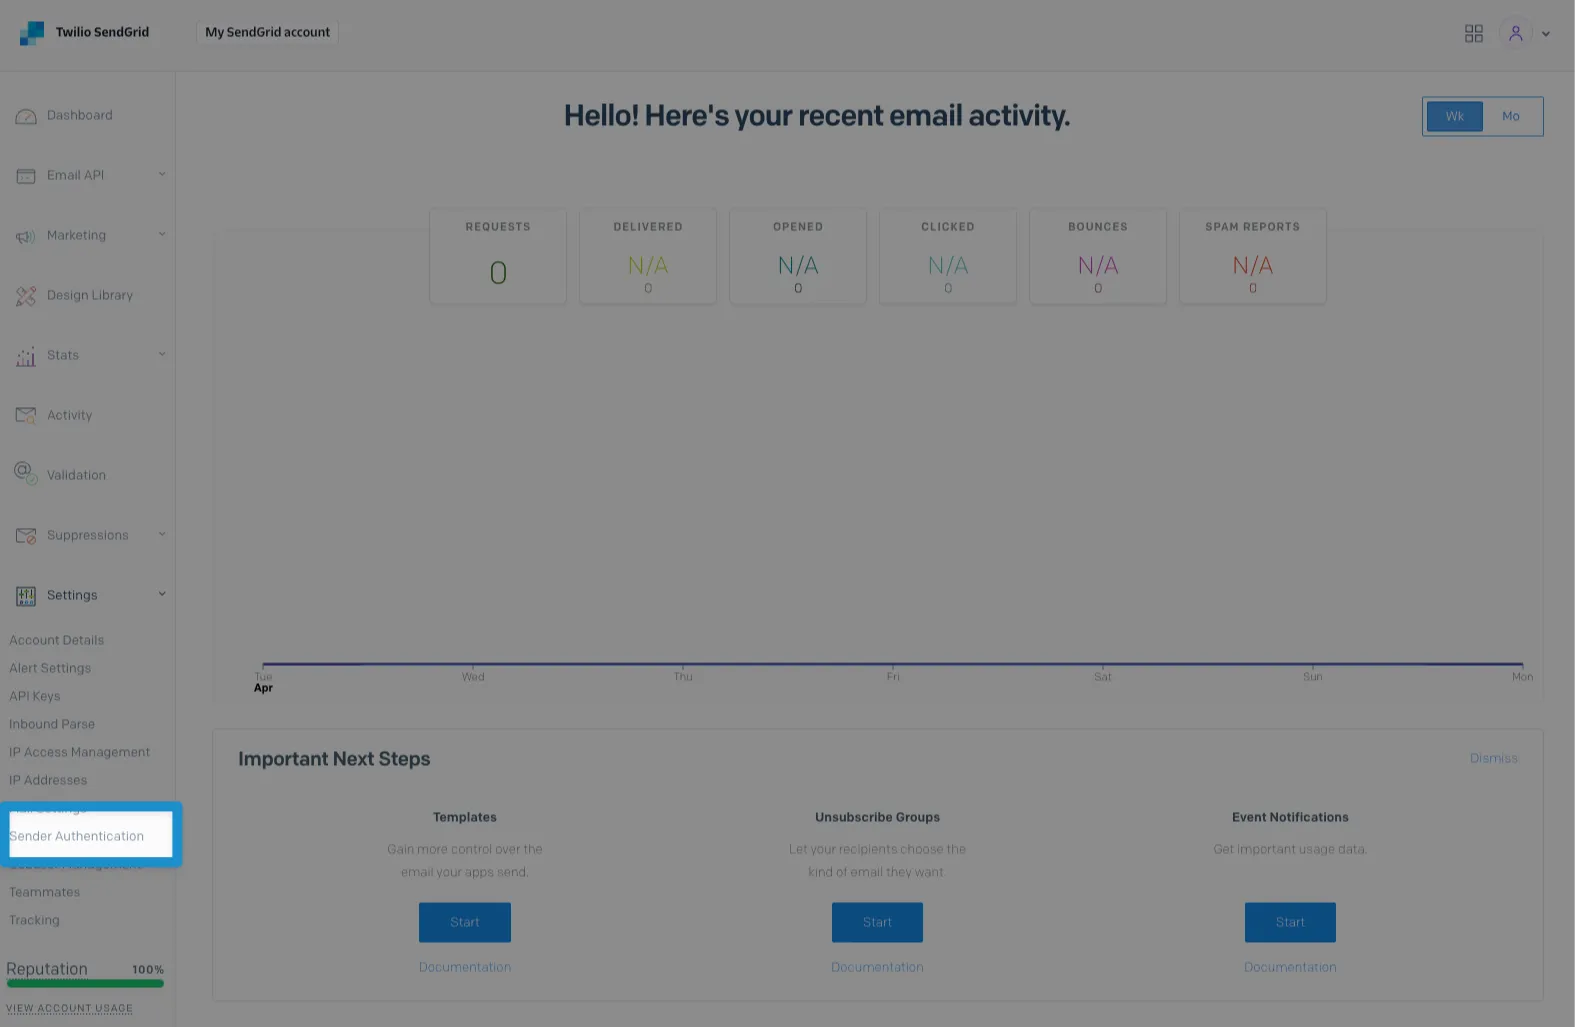
From the left side menu, click on Settings, then on Sender Authentication.
-
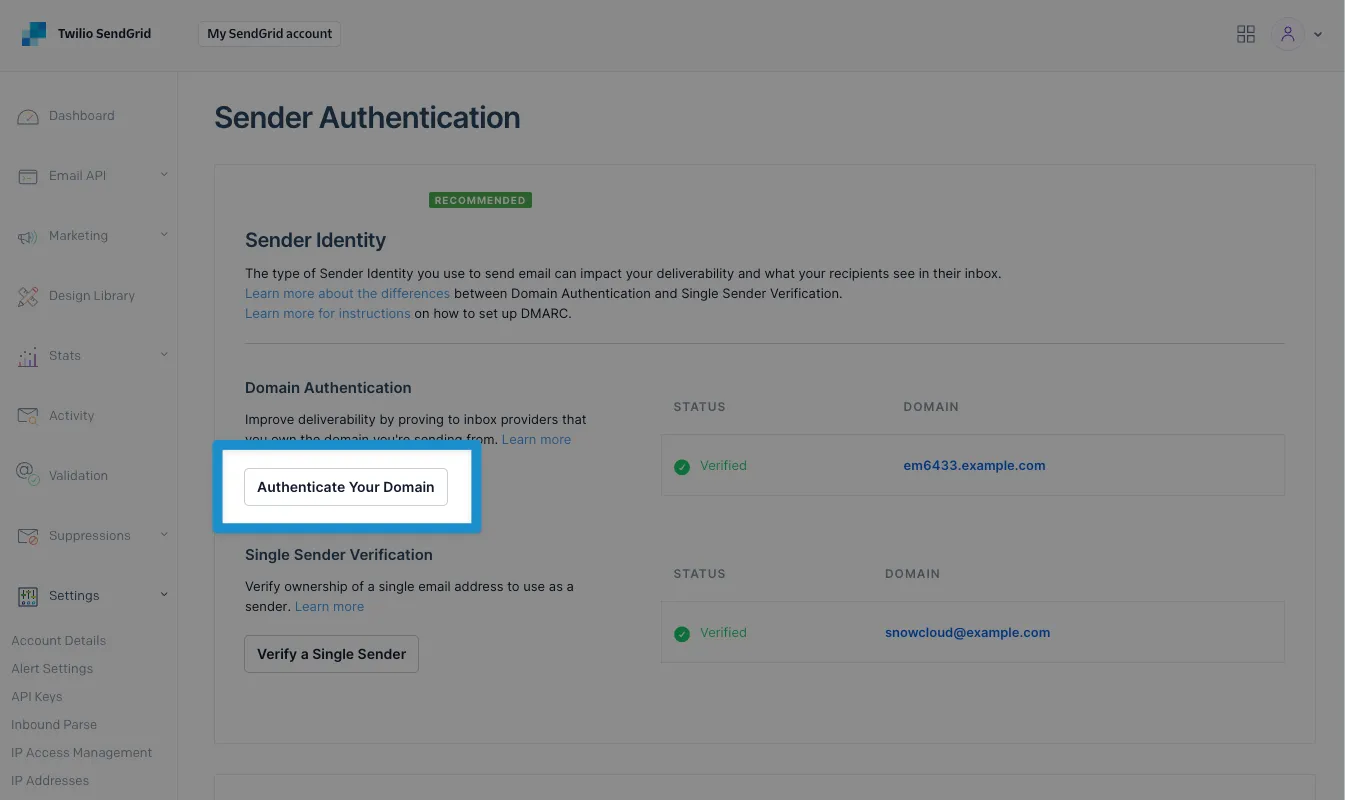
On this page, locate the Domain Authentication section, then click on Authenticate Your Domain.
-
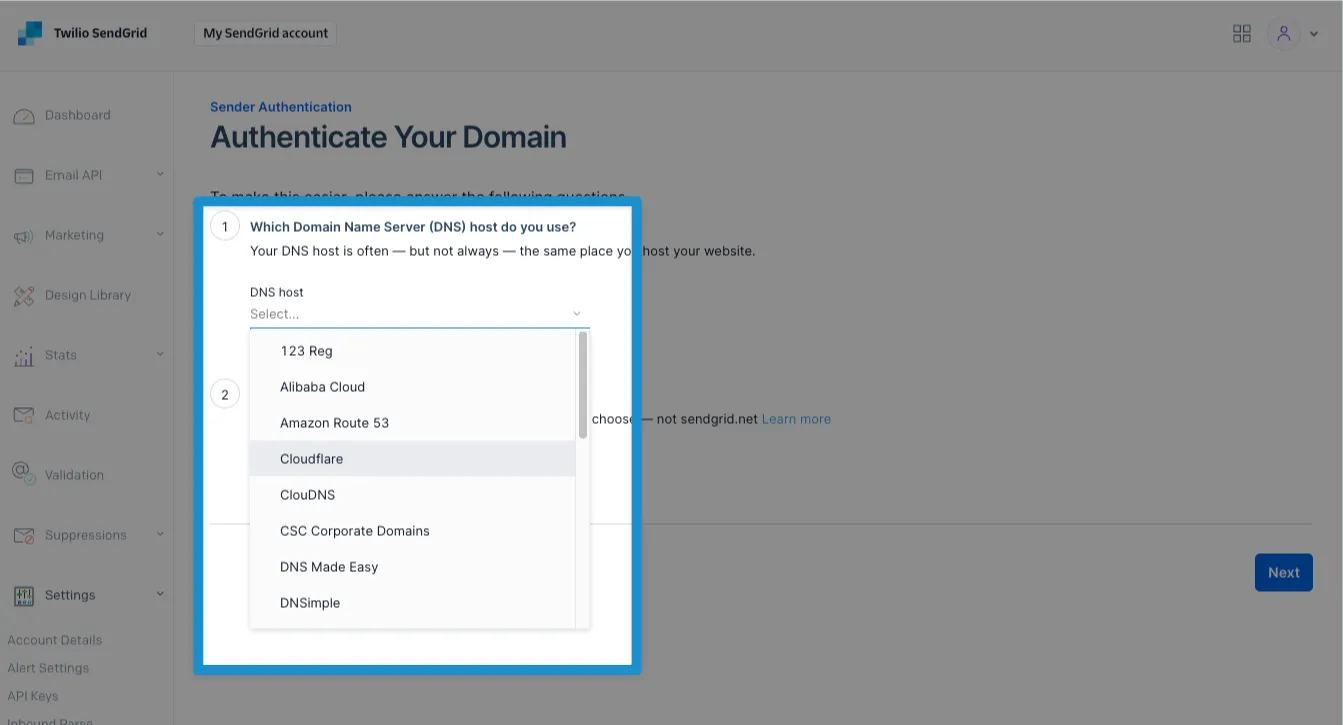
Using the DNS Host dropdown, select your domain’s DNS Host (GoDaddy, Cloudflare, AWS, etc.)
If you are unsure which host is being used for your domain, contact your domain administrator or select “I’m not sure”.
-
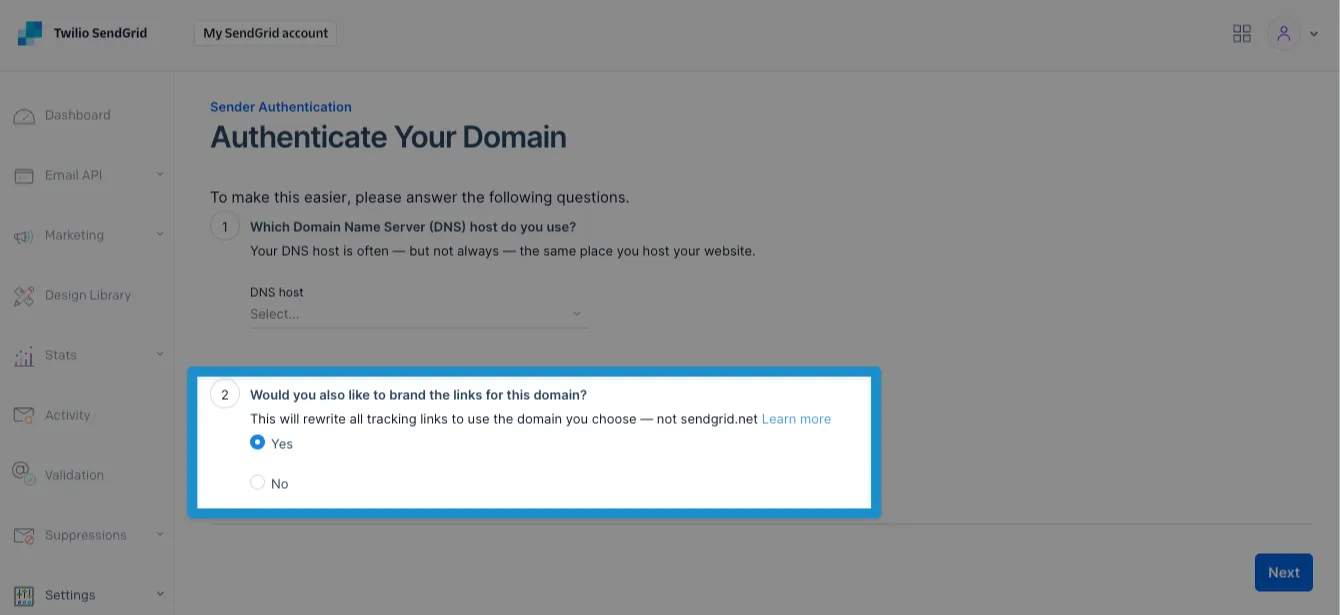
When asked if you would like to use branded links, select Yes, then click on the Next button to proceed to the next screen.
-
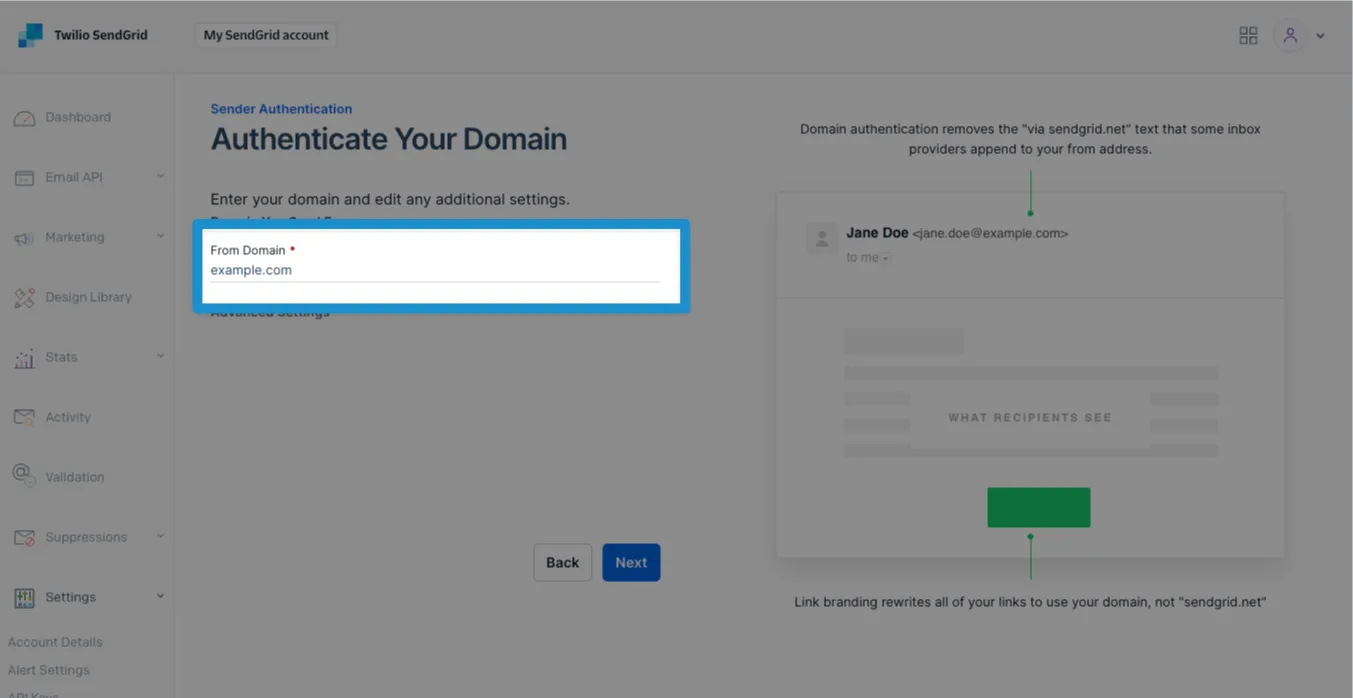
Next, you’ll be prompted to provide your domain. Enter your From Domain (mountaincreek.com, bigsnowad.com, etc.), then click Next to proceed to the next screen.
-
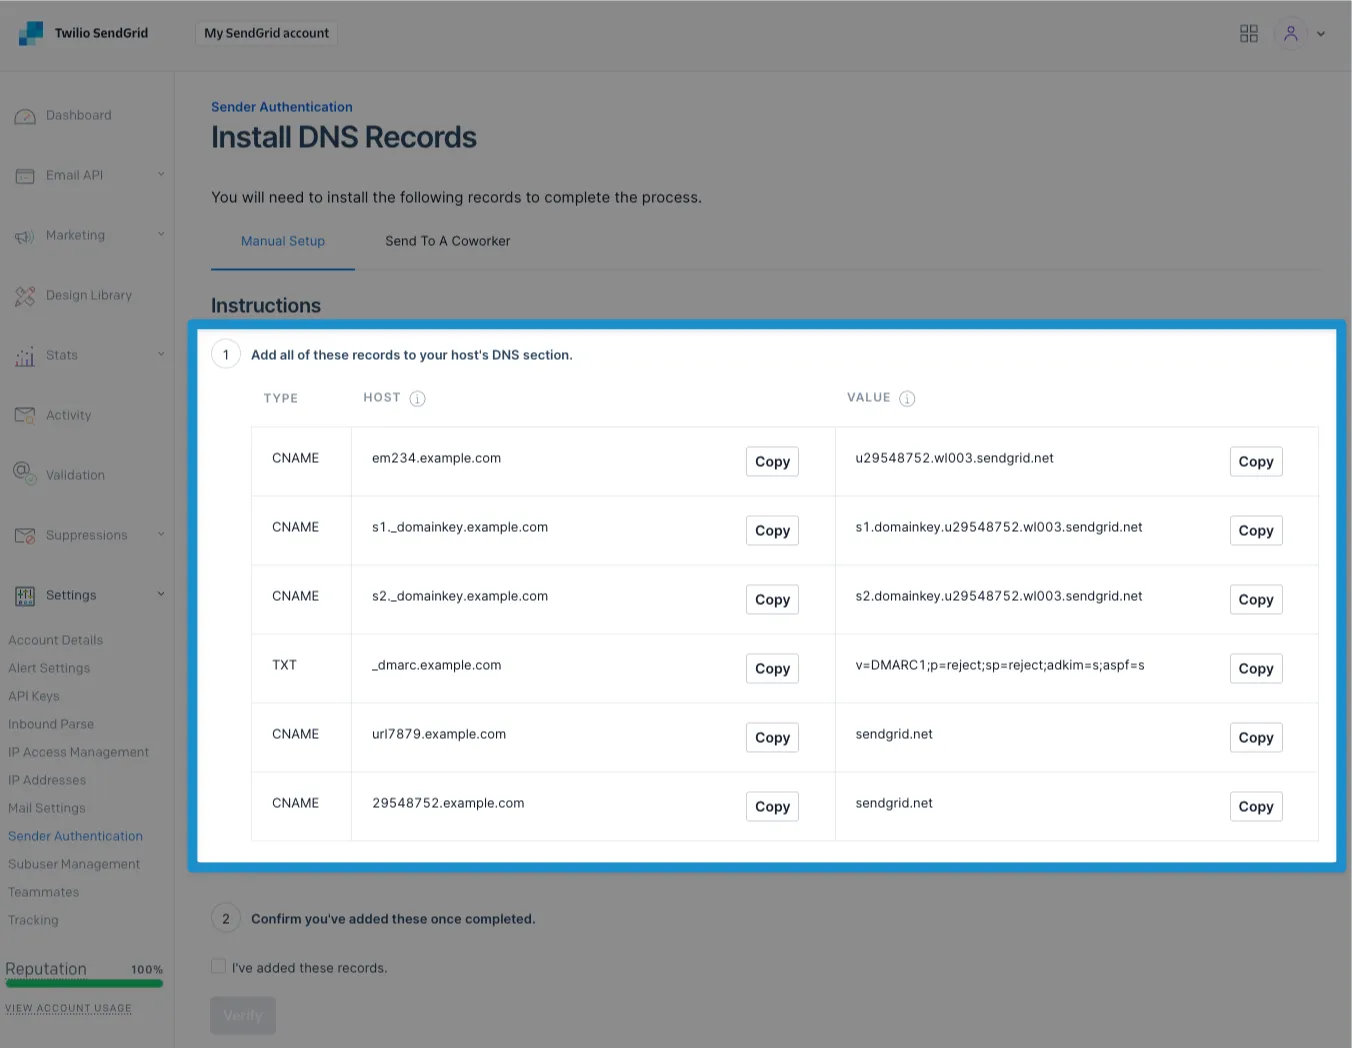
After submitting your domain, SendGrid will provide you with a set of DNS records that will need to be updated.
The process for updating these records will vary across domain registrars/DNS providers. For more information on how to update these, refer to your domain’s DNS host’s documentation.
To send these changes to your domain administrator, the Send To A Coworker tab can be used to email a copy of the DNS records to someone else.
-
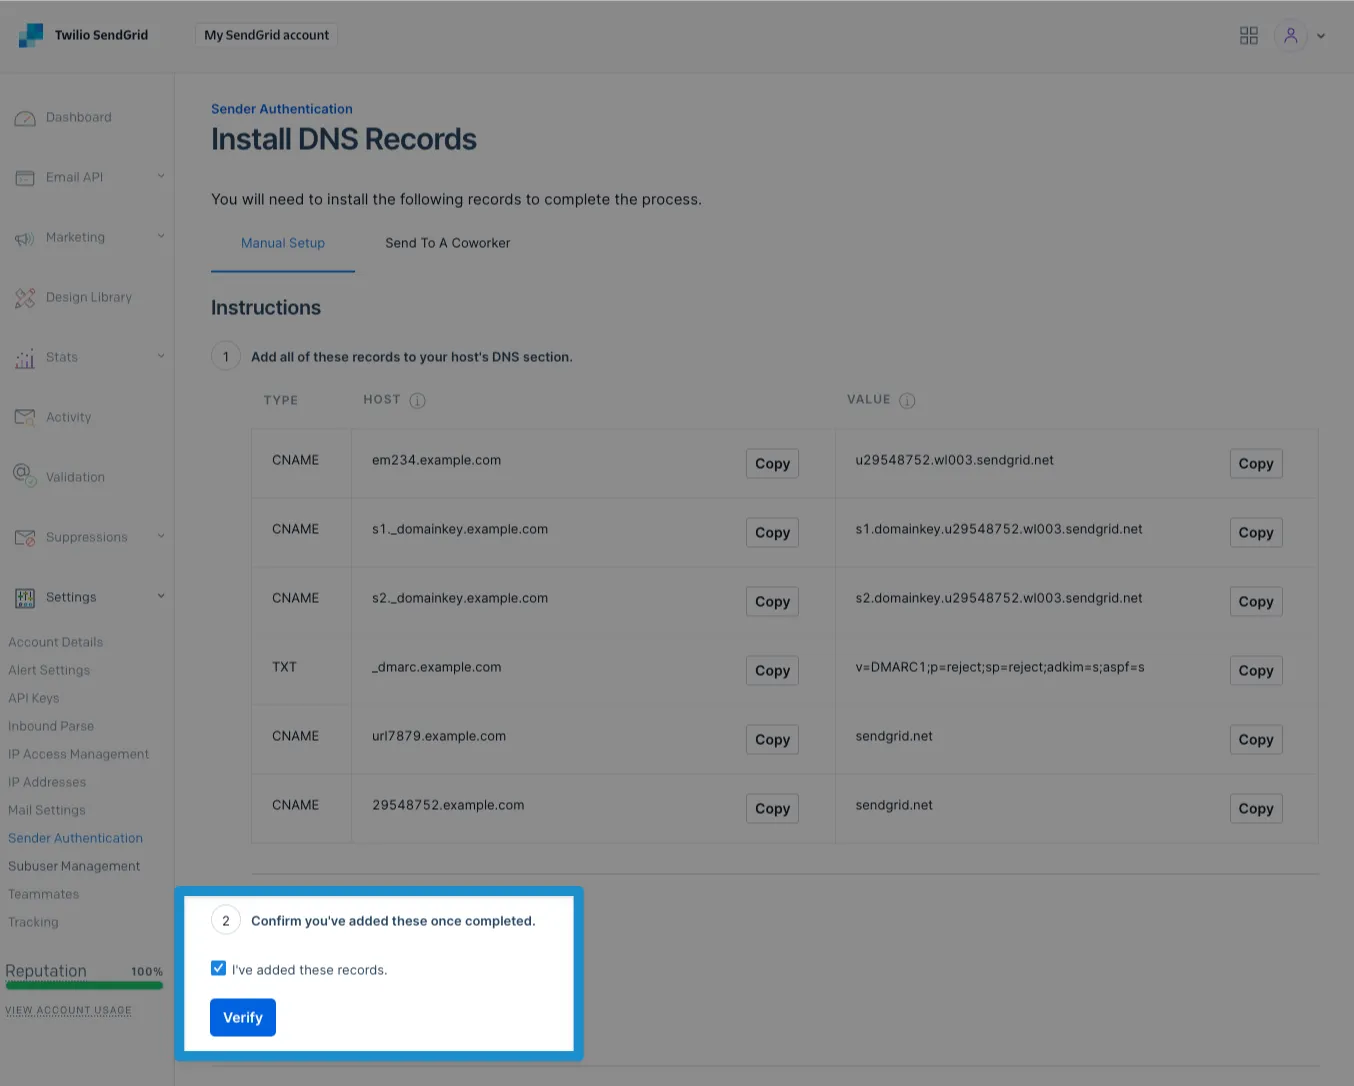
After the DNS changes are complete, use the confirmation checkbox to confirm that the changes have been made.
If you’re coming back to complete validation later, you can resume the validation process by going back to the Sender Authentication screen, clicking on your domain, then clicking Verify at the top right of the screen.
Please note that after making changes to a domain’s DNS records, the changes can sometimes take up to 24 hours to complete.
Your domain should now be verified. If there are any issues, please refer to the following troubleshooting steps or contact your SnowCloud representative.
Step 3: Obtaining an API Key
To facilitate the connection of your SnowCloud account to SendGrid, you’ll need to generate an API key. Here’s how to generate one:
-
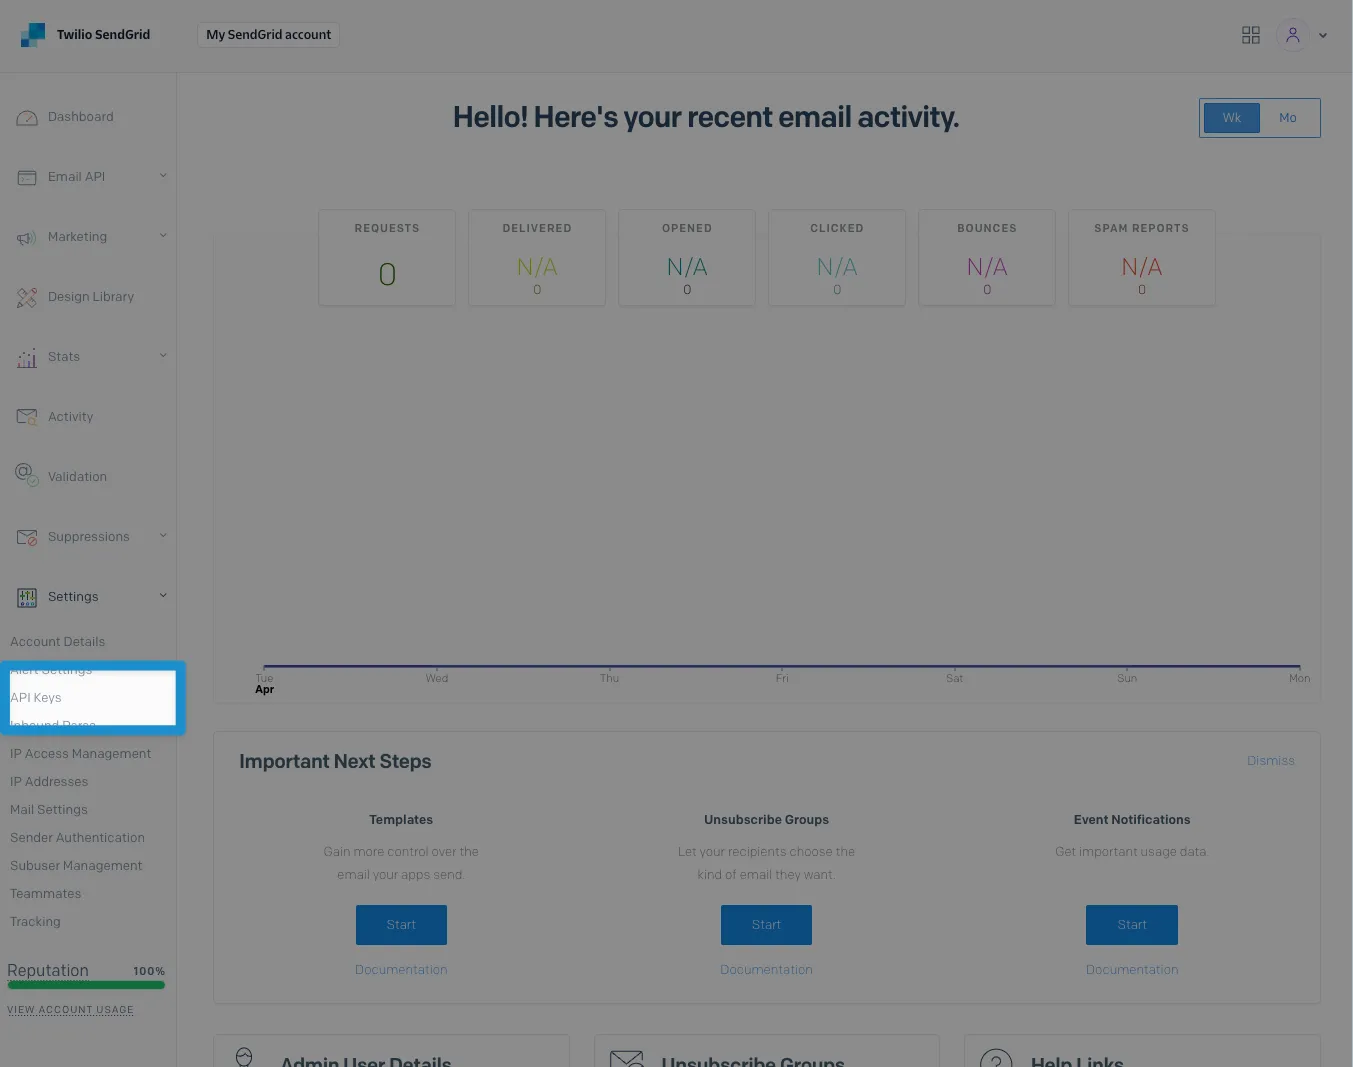
From the left side menu within SendGrid, click on Settings, then on API Keys.
-
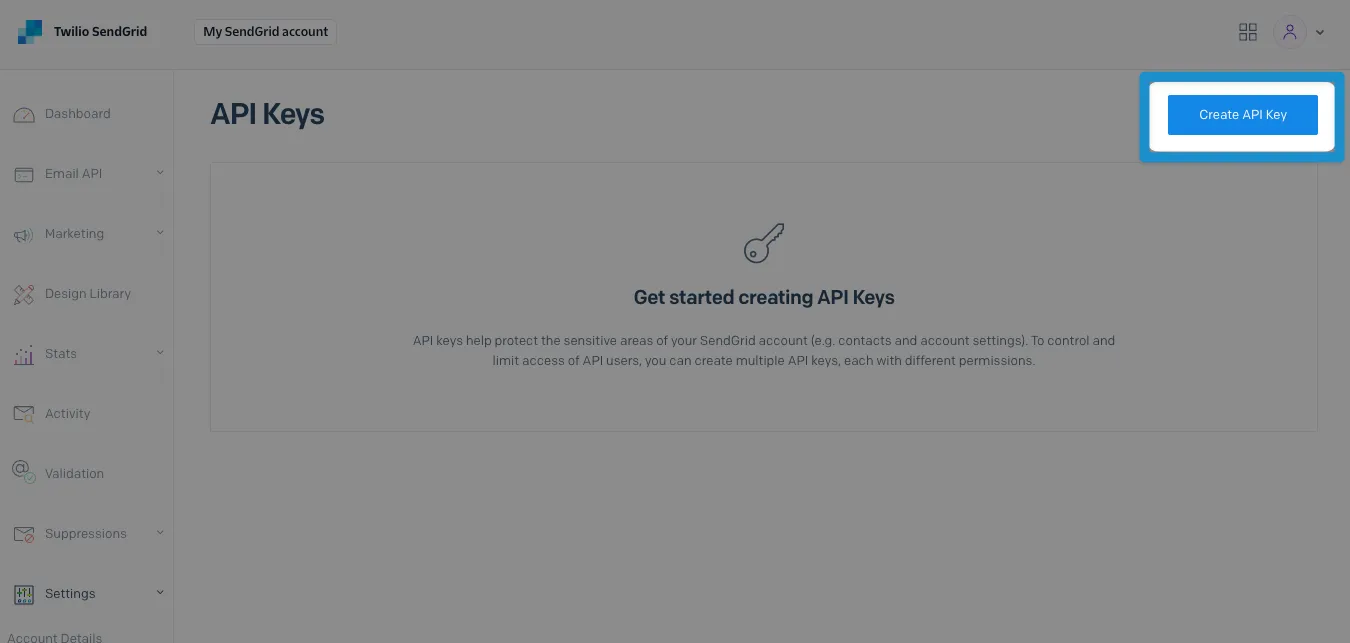
At the top right of the page, click on Create API Key.
-
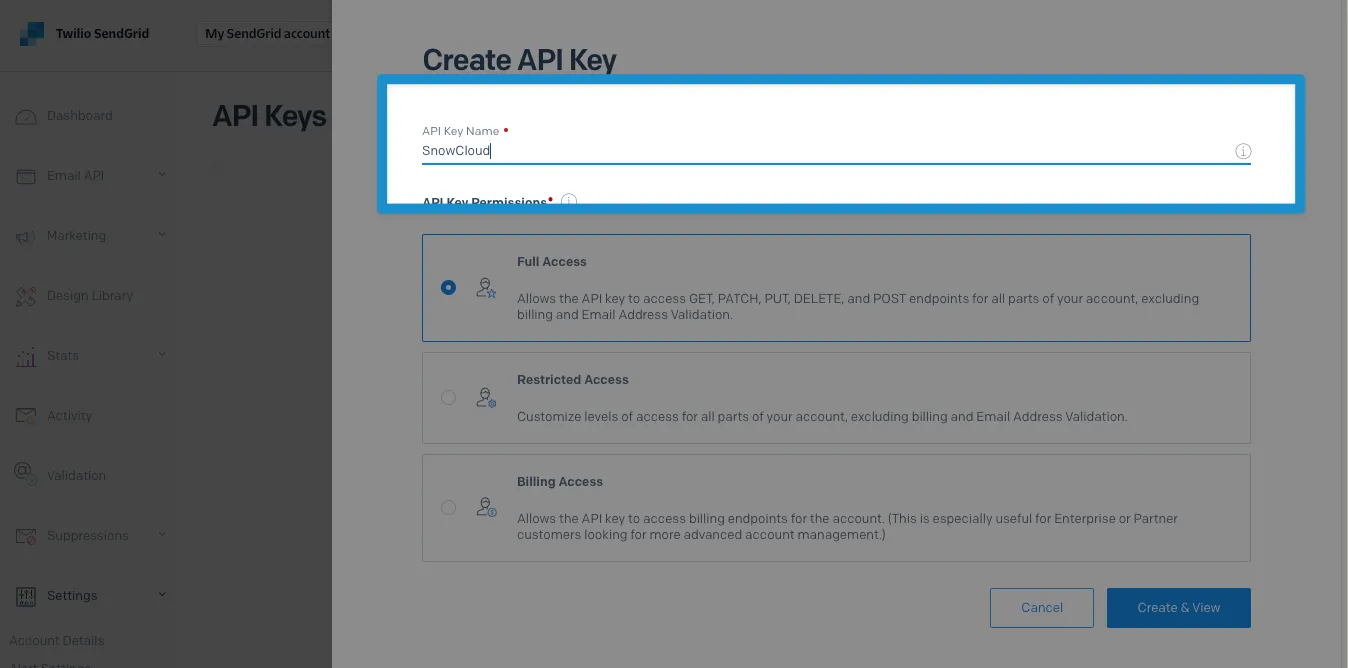
First, enter any name into the API Key Name. We recommend something that you can easily identify later, such as SnowCloud.
-
Next, under API Key Permissions, select Full Access.
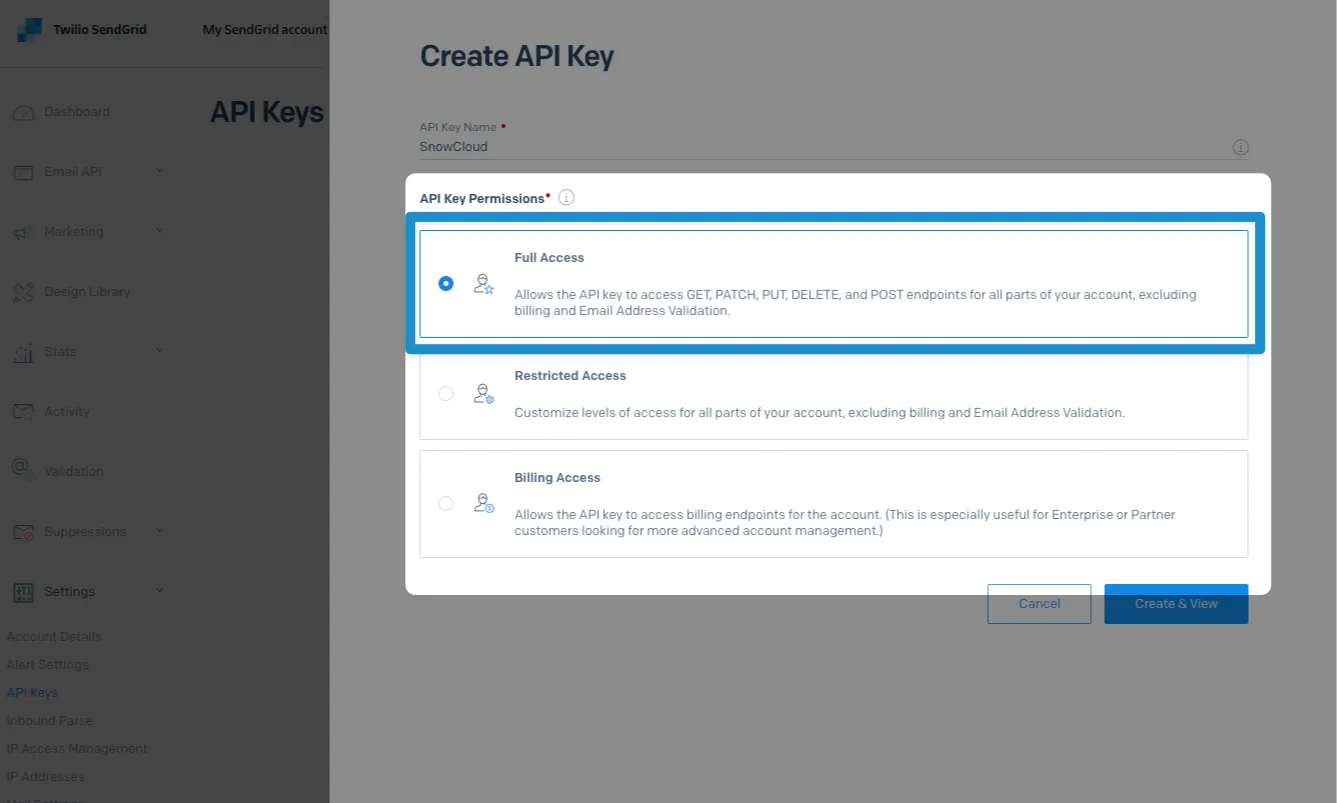
Optionally, you can customize your access level, although this is outside of the scope of this article.
-
Finally, click on Create & View to create your new API key.
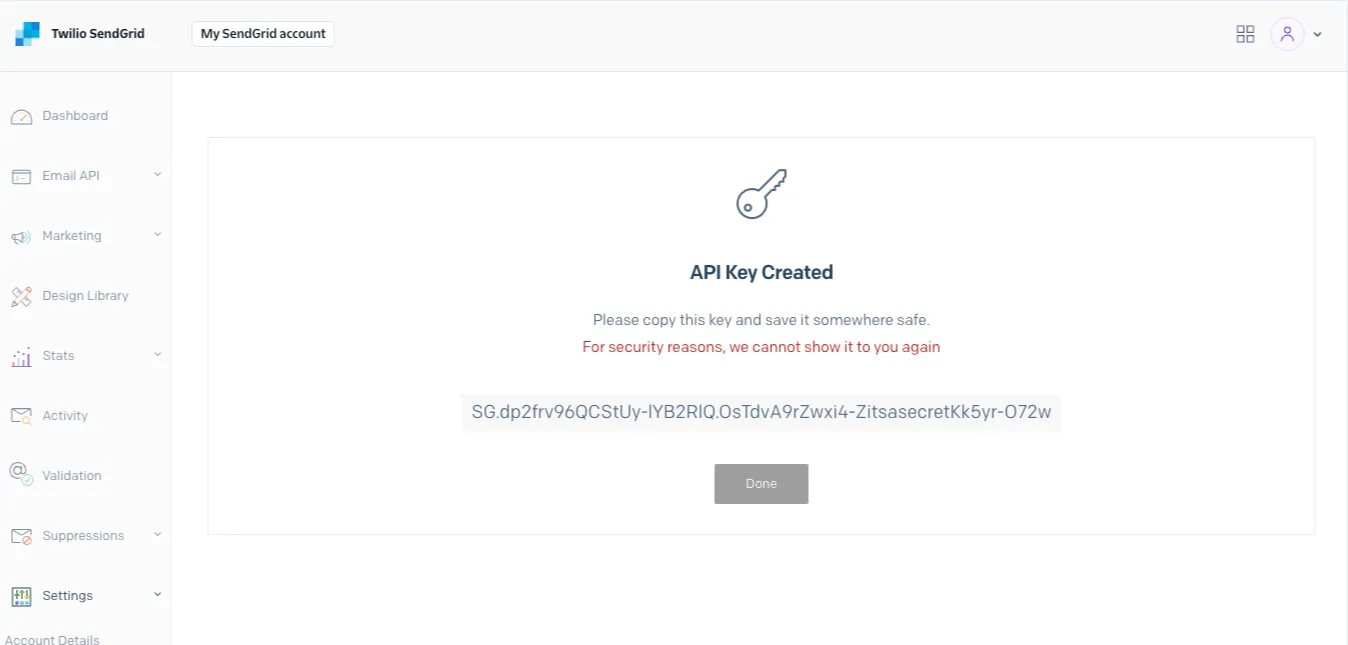
Once prompted with your API key, save it to a safe place. You’ll need it later.
Step 4: Setting Up Link Branding
Branded links allow you to use your custom domain within emails sent from SendGrid, rather than the default sendgrid.net URLs. After verifying your domain, follow these steps to configure branded links:
-
From SendGrid’s left side menu, click on Settings, then on Sender Authentication.
-
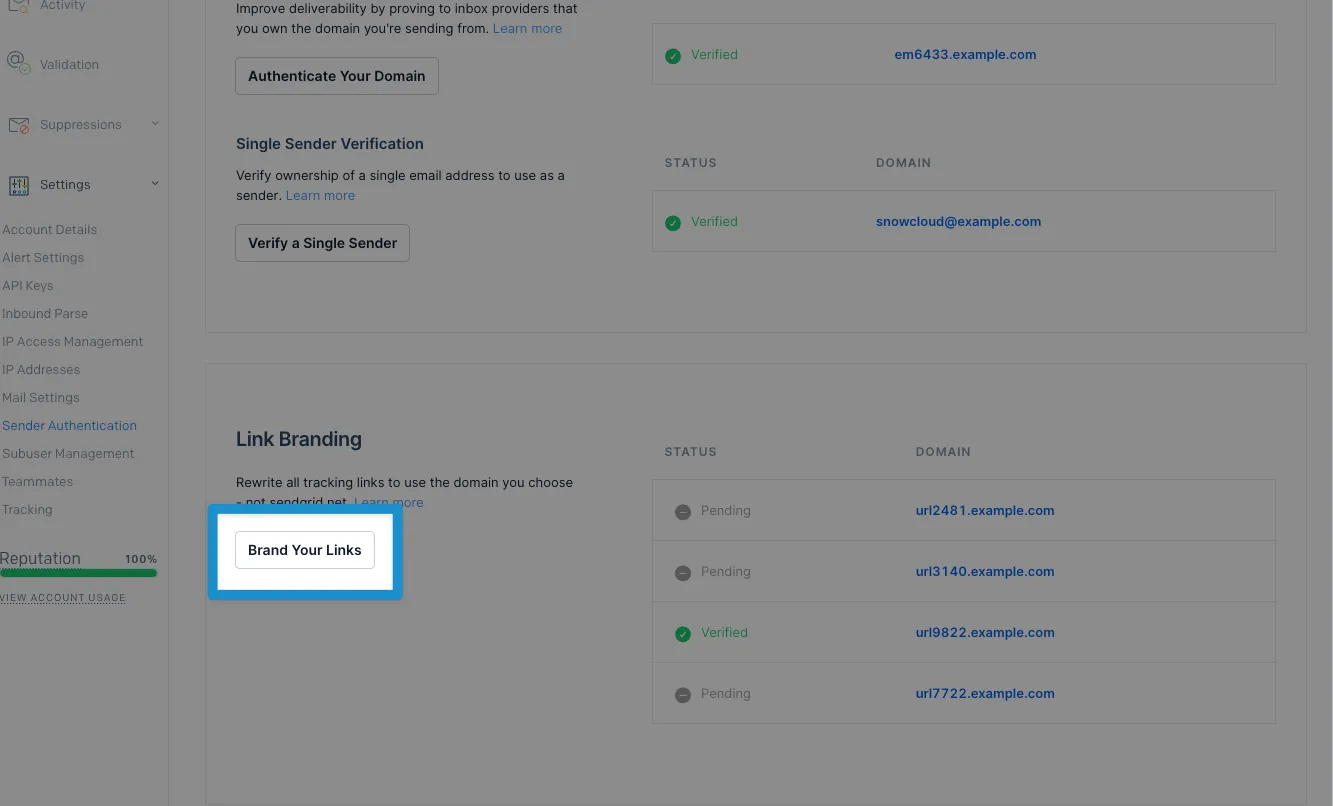
On this page, locate the Link Branding section and click on Brand Your Links.
-
Using the DNS Host dropdown, select your domain’s DNS Host (GoDaddy, Cloudflare, AWS, etc.)
If you are unsure which host is being used for your domain, contact your domain administrator or select “I’m not sure”
-
Next, you’ll be prompted to provide your domain. Enter your From Domain (mountaincreek.com, bigsnowad.com, etc.), then click Next to proceed to the next screen.
-
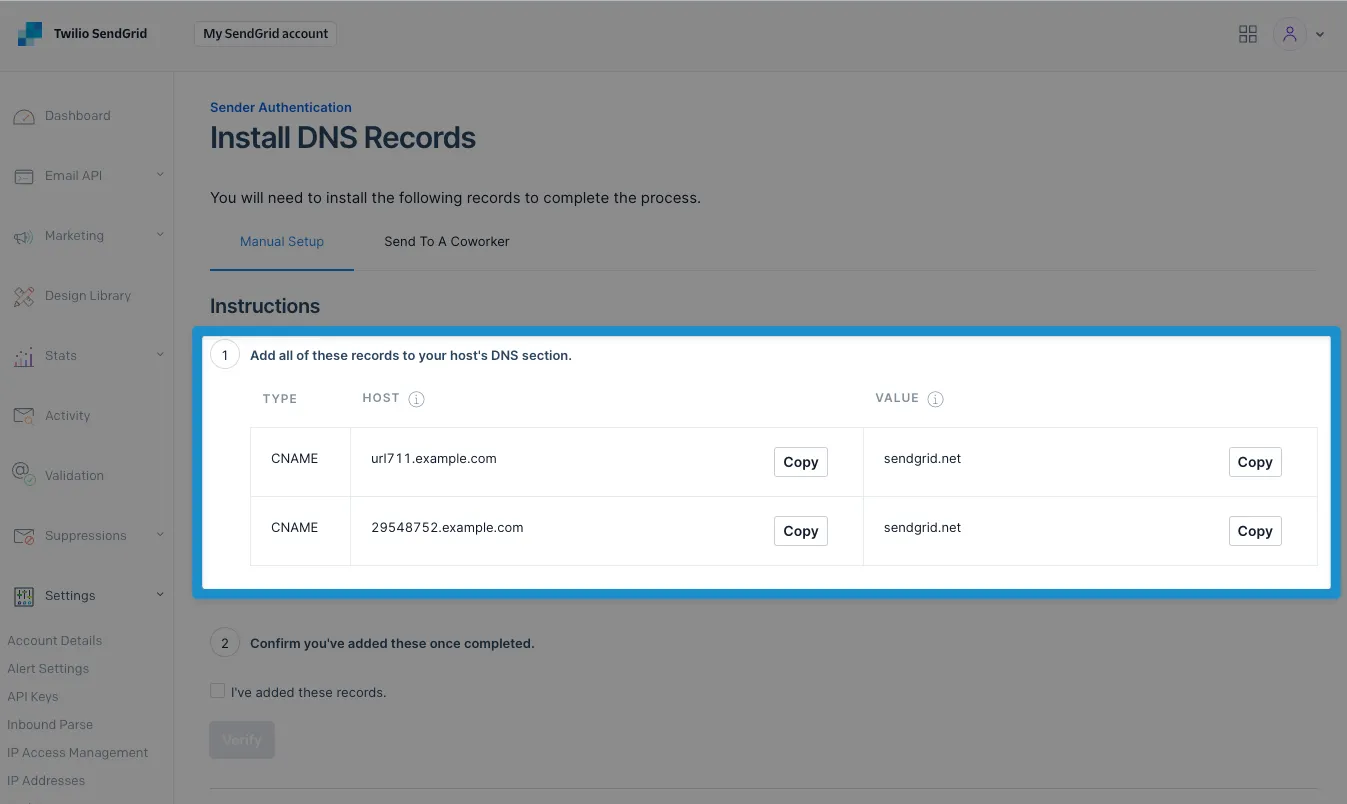
Like the domain verification process, SendGrid will provide you with DNS records to configure. Add these records or use the Send To A Coworker tab to send them to your domain administrator.
-
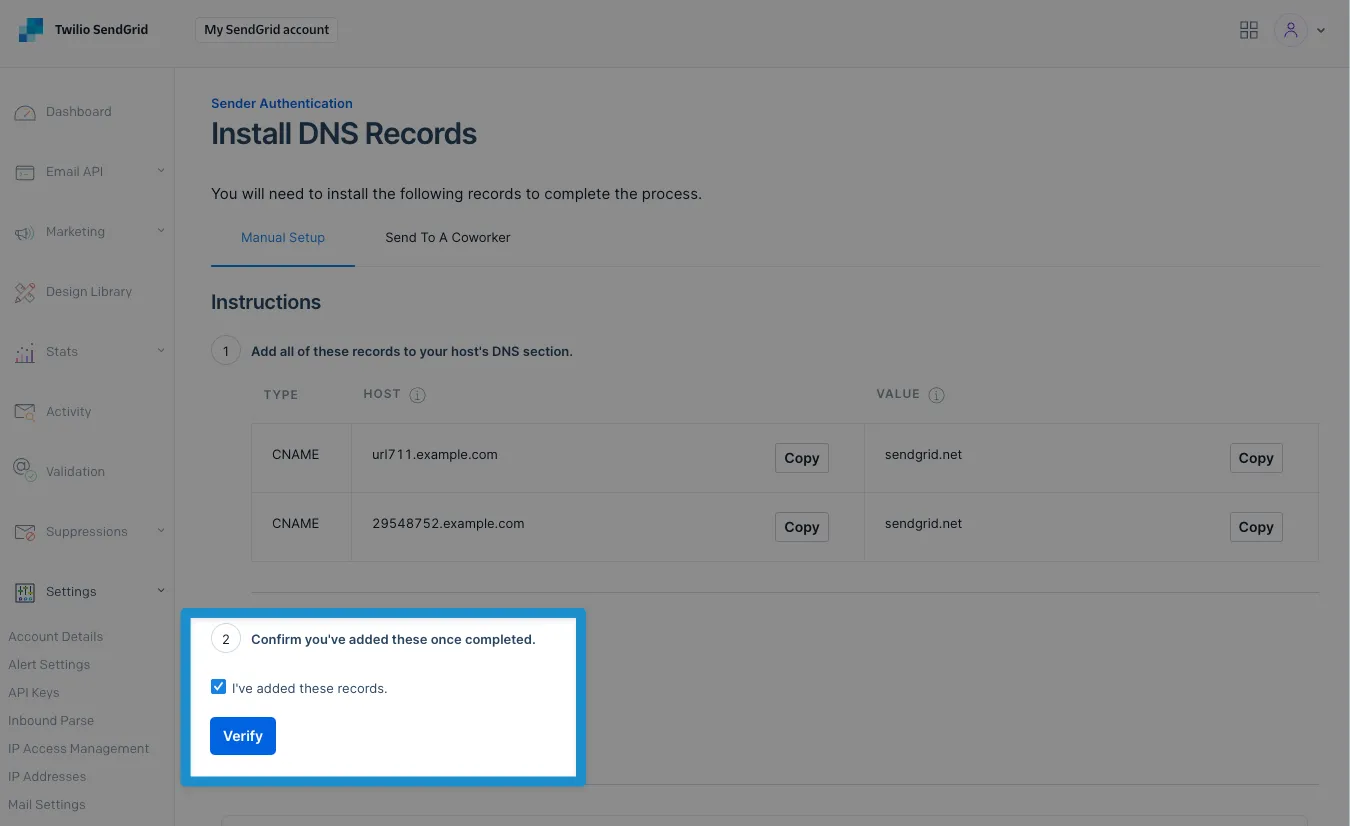
Once the changes are in place, use the confirmation checkbox to confirm that the changes have been made, then click Verify.
Step 5: Testing
If your Sender Authentication Screen looks similar to the image below, reach out to your SnowCloud representative to begin testing.
Plan Upgrade
After emails are confirmed to be working as intended, the SendGrid account will need to be upgraded from the Free version in order to send more than 100 emails per day.
We recommend the Essentials plan to start, for $34.99 / month (at time of writing), for 100k emails per month.