Activities
Activities are logical divisions in your operation. In this article, we’ll cover how to create and manage activities within SnowCloud.
A complete guide on setting up Activities can be found in our Quickstart guide. See the Creating Activities page for step-by-step instructions.
Configuring Activities
Your resort’s activities can be added, removed, or modified at any time. To make changes to your configured Activities, follow these steps:
- Log into your SnowCloud web portal.
- On the left side navigation, click on Setup, then on Activities.
On this page, you’ll see a list of all currently configured activities. You can click on any activity to modify its settings, or create a new activity by clicking the plus sign in the top right corner.
Activity Settings
When creating or modifying an activity, you’ll be presented with several options to configure.
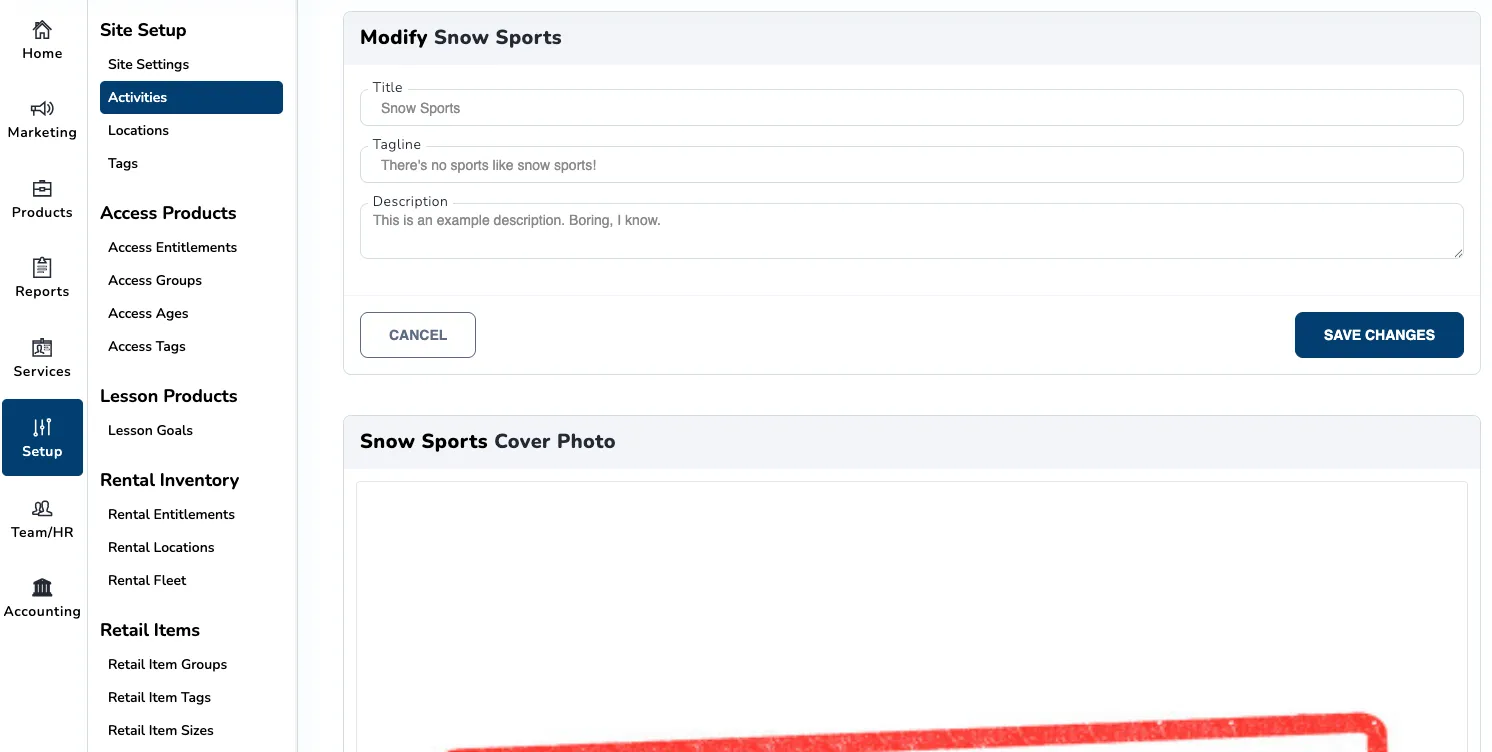
Title
The title is the name of the activity that will be displayed in your shop. Choose a name that clearly represents the activity to your guests.
Examples include:
- Snow Sports
- Snow Tubing
- Bike Park
- Water Park
Tagline
The tagline is an optional short catchphrase or slogan for the activity. This will be displayed alongside the activity title in your shop.
Description
The description is an optional field where you can provide more details about the activity. Note that this description will not be visible within your shop.
Cover Photo
When adding a new activity, this section will not be displayed until after the activity has been saved for the first time.
The cover photo is a banner image that will be displayed at the top of the activity shop page. If multiple images are selected, they will be displayed in a carousel format.