Setting Up Your Rental Fleet
This guide walks you through setting up your rental inventory in SnowCloud, including rental sizes, classifications, and inventory items.
For an overview of rental fleet concepts (fleets, sizes, and classifications), see the Rental Fleet Reference.
Understanding the Setup Process
Before adding inventory, you need to configure the structure:
- Rental Fleets are pre-configured broad categories (ski boots, snowboards, bikes, etc.)
- Rental Sizes define the actual measurements within each fleet
- Rental Classifications are specific items within a size (brand, color variants)
- Inventory Items are individual barcoded items in each classification
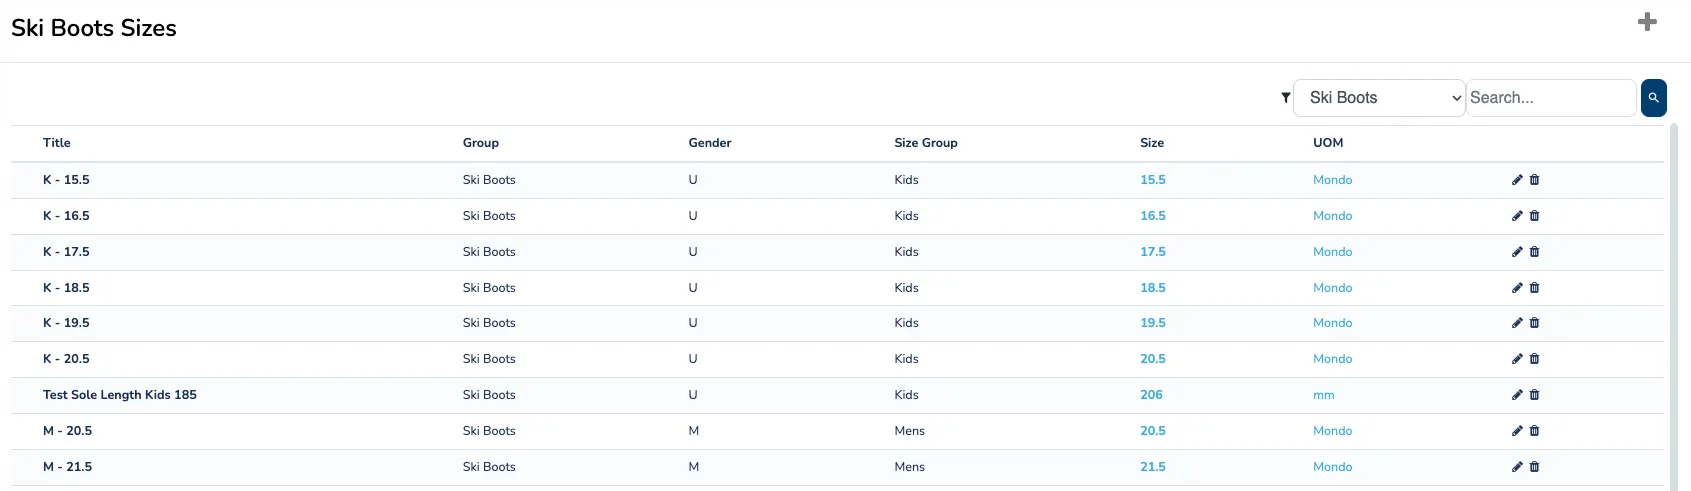
Creating Rental Sizes
Each fleet needs sizes configured before you can add classifications or inventory.
-
Navigate to the Rental Fleet page by clicking Setup, then under Rental Inventory, click Rental Fleet.
-
Click on the fleet you want to configure.
-
Click the Sizes button in the left column to open the sizes menu.
-
Click the Plus icon in the upper right corner to open the size creation form.
-
Enter a Size Title that describes this size in readable terms.
-
Select an Age Group:
- Kids
- Men’s
- Women’s
For unisex adult sizes (like ski boots), select “Men’s” as the age group.
-
Select a Gender:
- Male
- Female
- Unisex
-
Select the Unit Type for this size:
- CM
- Inches
- Min/Max - CM
- Min/Max - Inches
- Shoe Size (US)
- Mondo
-
Enter the Unit Value for the selected unit type (e.g., the Mondo point or shoe size number).
-
Click Save & Close.
Creating Rental Classifications
Classifications let you track specific item variants within a size.
- Navigate to the Rental Fleet page.
- Click on the fleet you want to configure.
- Verify that Rental Sizes are already configured for this fleet.
- Click the Plus icon in the upper right corner to open the classification creation form.
- Select a Size Group from your configured sizes.
- Optionally, select a Vendor for this classification. Select Other to add a new vendor.
- Optionally, select a Color for quick visual identification.
- Optionally, customize the Name (auto-generated from vendor, size, and color).
- Click Save & Close.
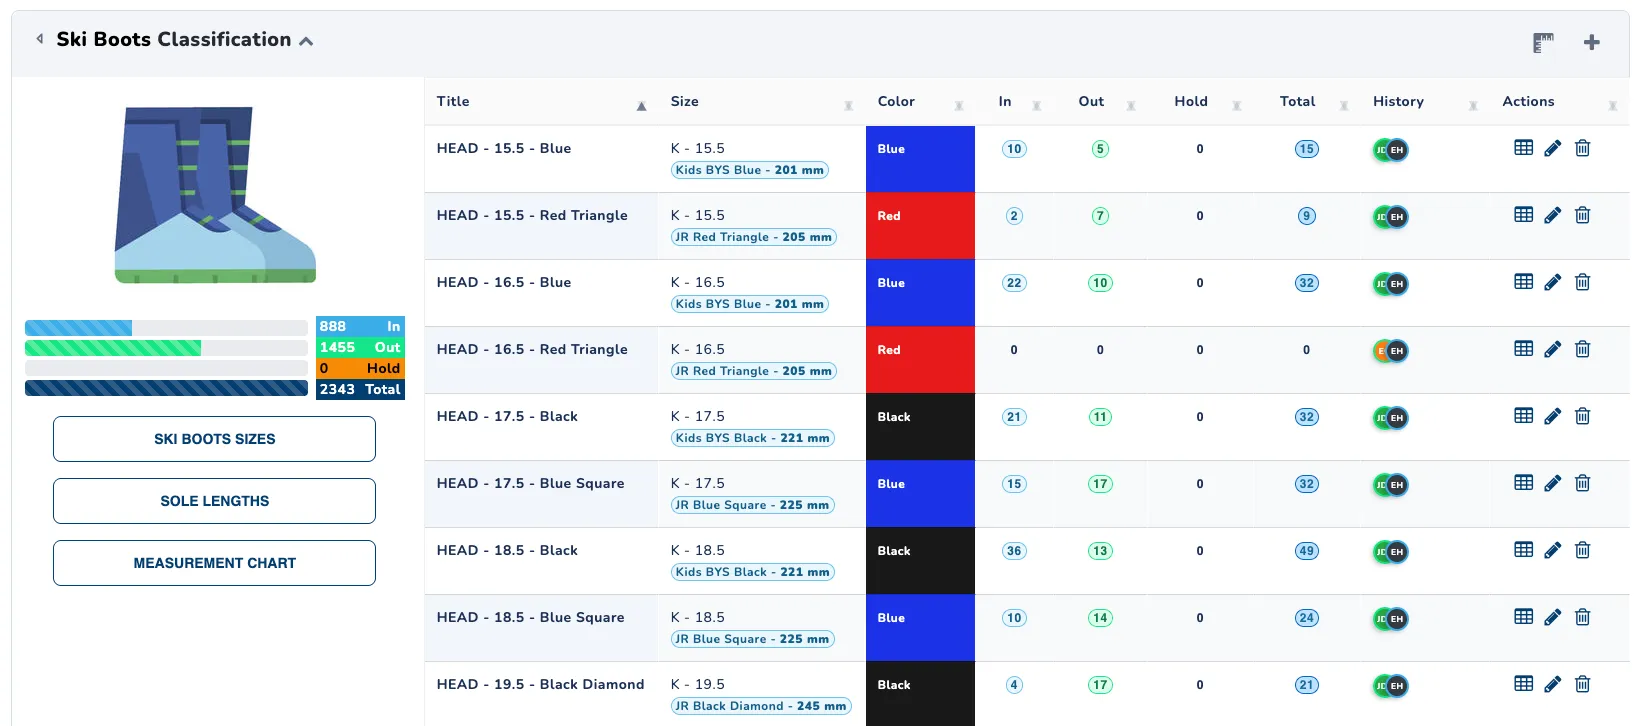
To modify a classification, click the pencil icon in the classifications list.
Adding Rental Inventory
Once classifications are set up, add individual inventory items using one of three methods:
Manual Entry
- Navigate to the Rental Fleet page.
- Click on the fleet to edit.
- Find the desired Rental Classification and click the table icon in that row.
- Click the Plus icon in the upper right corner to open the Add Inventory form.
- Enter barcodes for each rental item, one per line.
- Click Save & Close.
Spreadsheet Import
- Navigate to the Rental Fleet page.
- Click on the fleet to edit.
- Find the desired Rental Classification and click the table icon in that row.
- Click the Upload button in the upper right corner.
- Download and review the template or example files.
- Format your data according to the template.
- Click Select Import File and upload your spreadsheet.
From the Operator App
- Open the Operator App and navigate to Rental Fulfillment.
- Click the Code button and scan an unknown barcode.
- When prompted, select which classification to add the item to.
All team members with access to Rental Fulfillment can add inventory this way. They don’t need special web portal permissions.
Next Steps
With your rental fleet configured, you can:
- Create rental products that grant entitlements to your fleet
- Set up a rental shop in the Operator App